Windows Autopilot lets you take new or reset Windows devices from out-of-box to fully configured and managed. Without building or maintaining custom images. Devices use the preinstalled Windows build, and Intune applies your policies and apps. Users see a streamlined setup flow, sign in with their work account, and end up on a managed, compliant device.
This guide walks through the end-to-end setup: what you need before you start, how to collect and register devices, how to configure the Enrollment Status Page and deployment profile, and what the user sees during setup.
Why Use Windows Autopilot?
Autopilot shifts deployment from “IT builds the image” to “the cloud configures the device.” Benefits include:
- Less IT overhead: No imaging servers, USB sticks, or per-device manual setup. You register the device and the user runs through a short wizard.
- OEM-optimized Windows: The device keeps the Windows version and drivers it shipped with, so you avoid image drift and driver issues.
- Consistent experience: Same flow for every user: language, keyboard, network, sign-in, then policies and apps apply.
- Reset and repurpose: You can use Autopilot to wipe and reconfigure devices for new users or scenarios without reimaging.
Before You Begin
Make sure you have:
- Microsoft Intune: An active Intune (or Microsoft 365) subscription so you can manage devices and assign profiles.
- Windows automatic enrollment: Azure AD/Entra ID configured so Windows devices enroll into Intune automatically when they join.
- Permissions: An Intune role that can manage Windows enrollment, Autopilot devices, deployment profiles, and Enrollment Status Page (e.g. Intune Administrator or a custom role with those rights).
Step 1: Collect the Hardware Hash
Each device must be registered with Autopilot using its hardware hash. You can get the hash in several ways: from the device (PowerShell, OOBE diagnostics page, or Settings), or from Configuration Manager if you use it. Microsoft’s documentation lists the exact steps for each method.
Once you have the hash, keep it in a CSV (with columns such as Device Serial Number, Windows Product Key, Hardware Hash, etc.) so you can upload it in the next step.
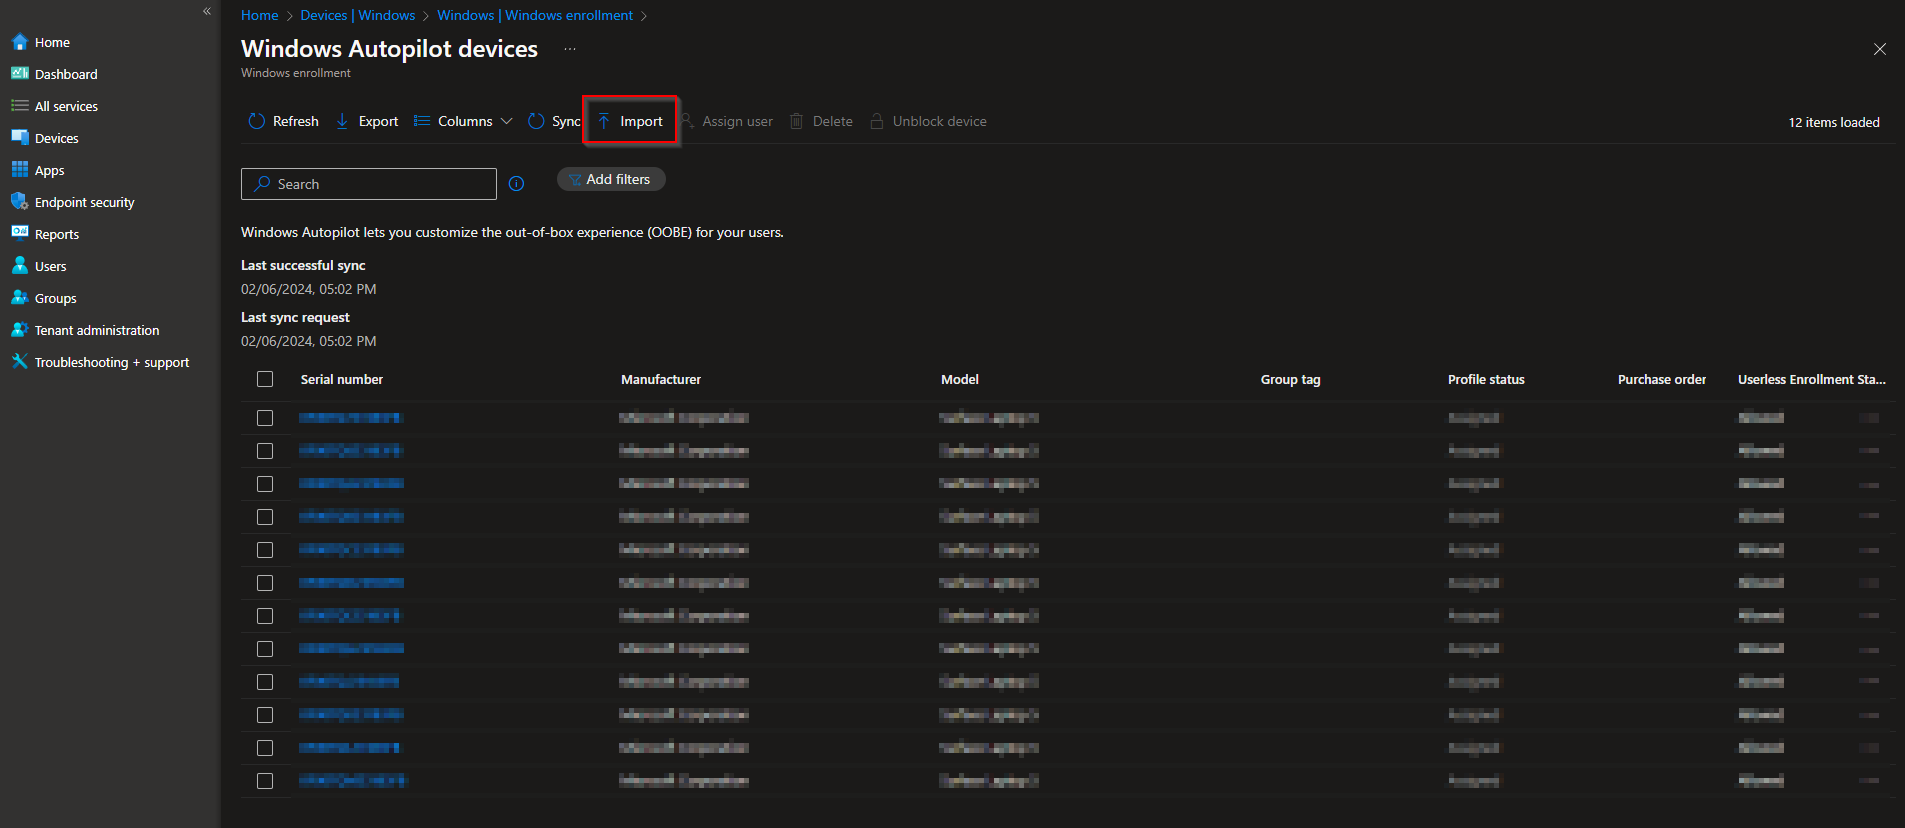
Step 2: Register Devices in Autopilot
In the Microsoft Intune admin center, go to Devices → Windows → Windows enrollment → Devices. Click Import and upload your CSV containing the hardware hashes.
After import, the devices appear in the list. If you’re about to run through setup, use the sync option so the service has the latest device data before the user starts OOBE.
Step 3: Configure the Enrollment Status Page
The Enrollment Status Page (ESP) appears during setup and shows progress (e.g. device config, device apps, user config, user apps). You can choose what to show, whether to block access to the desktop until certain steps succeed, and timeouts.
You don’t have to create an ESP, but it helps users understand that the device is still configuring. To create one: Devices → Windows → Windows enrollment → Enrollment Status Page → Create. Give it a name (e.g. Windows Autopilot), configure the settings you want, then assign it to the same groups you’ll use for the Autopilot profile.

Step 4: Create and Assign an Autopilot Deployment Profile
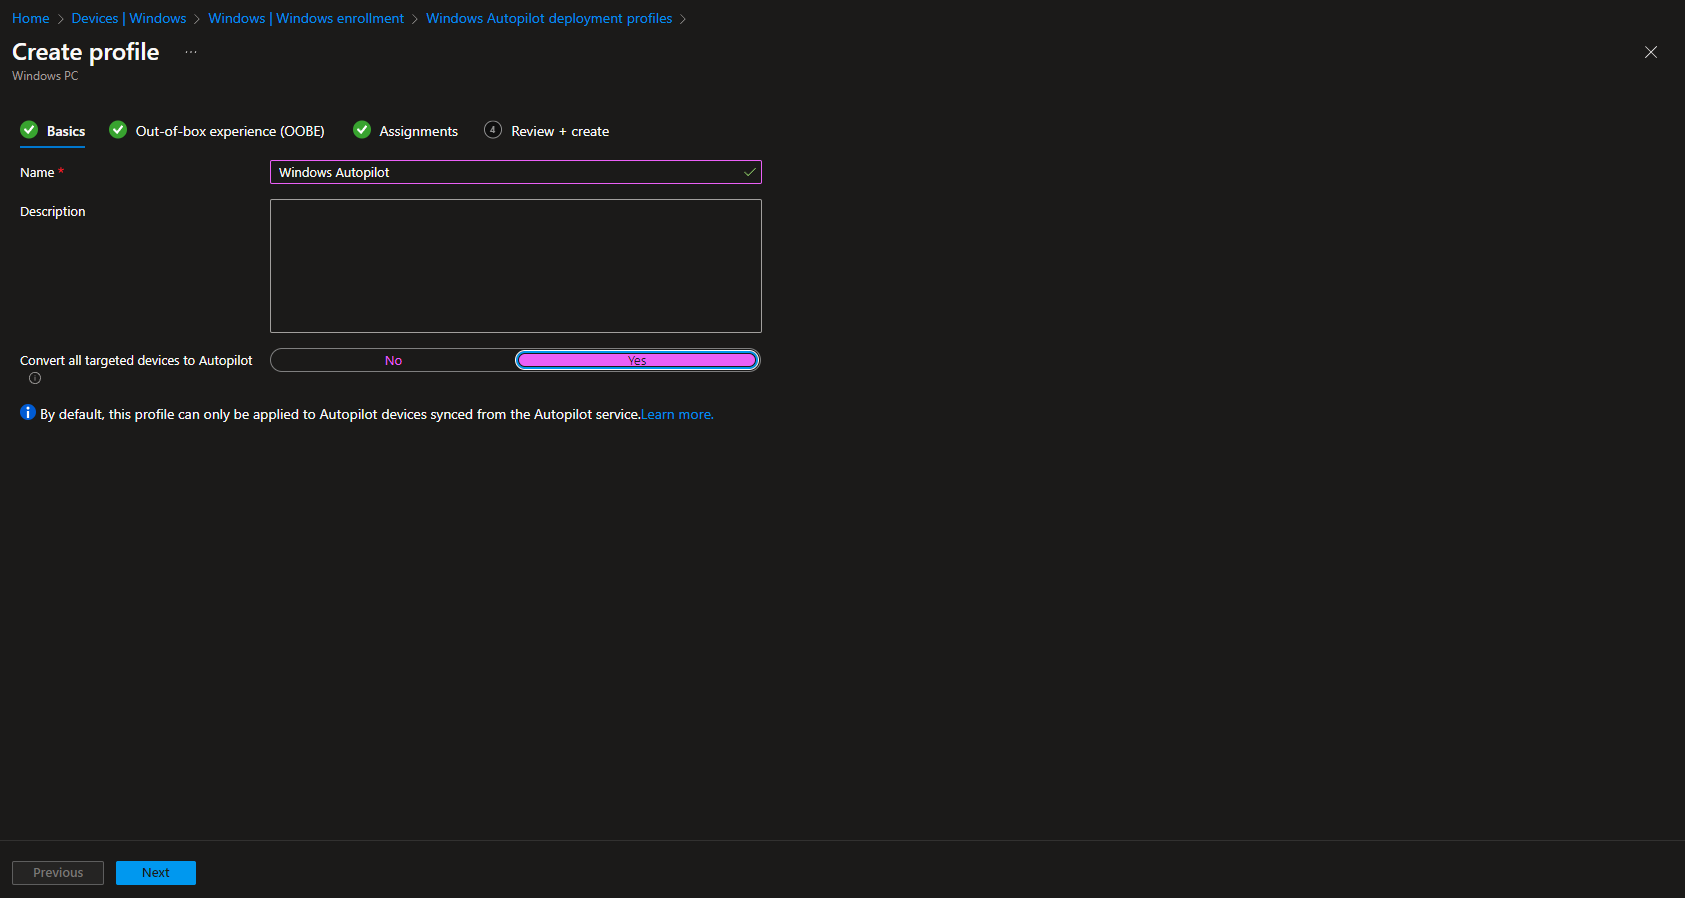
The deployment profile defines the out-of-box experience: join type (Azure AD joined), which prompts to show or hide, user account type, and optional device naming. Go to Devices → Windows → Windows enrollment → Deployment profiles → Create profile.
On the first page, name the profile and choose whether to convert targeted devices to Autopilot if they aren’t already. Click Next.
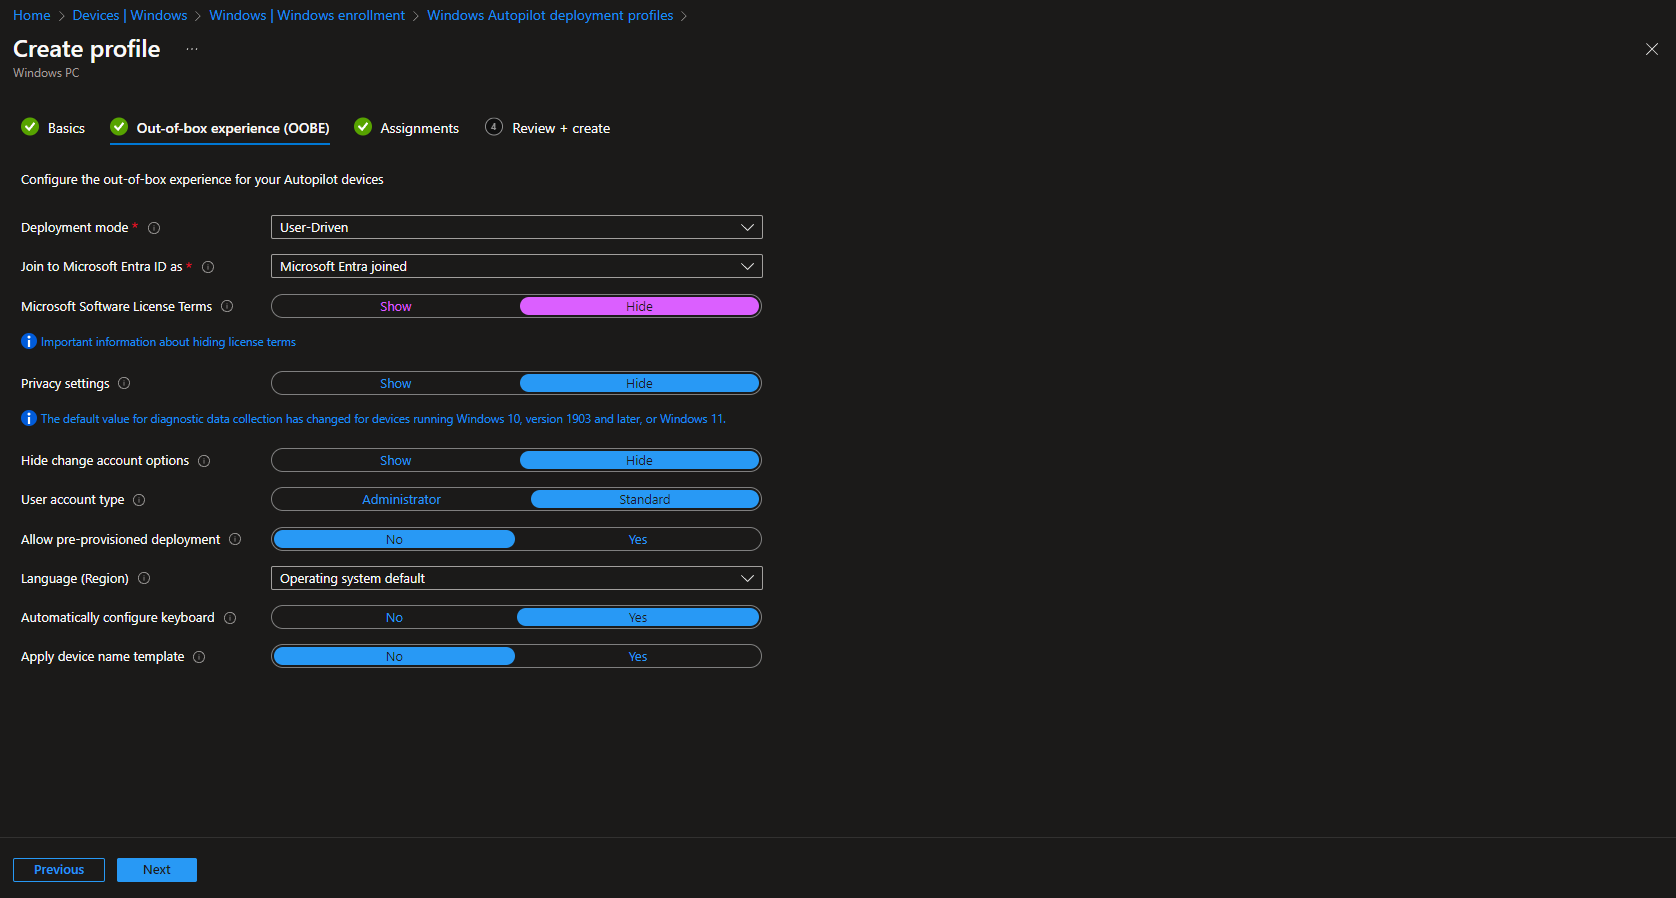
On the Out of box experience (OOBE) page you can set deployment mode (e.g. User driven), join type (Azure AD joined), hide or show license terms and privacy, hide “Change account” options, set user account type (e.g. Standard), allow or block White Glove, and configure language and keyboard. A common set is: User driven, Azure AD joined, hide license and privacy, Standard user, and apply a device name template if you use one.
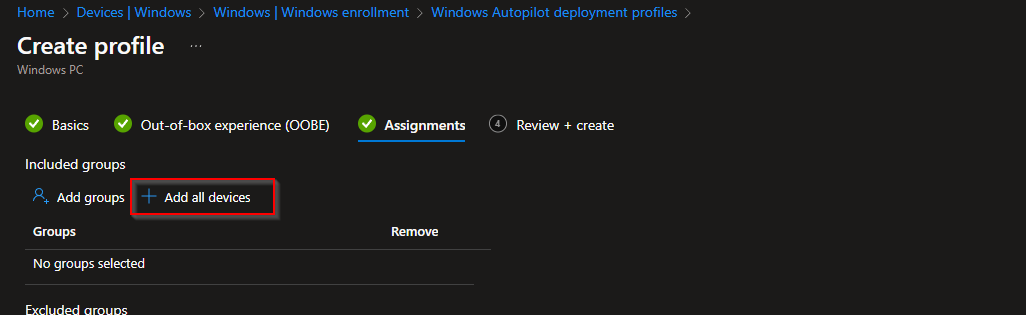
On Assignments, add the groups that contain your Autopilot devices (or All Devices if appropriate). Finish with Review + create and then Create.
What the User Sees
After you reset the device or boot a new one that’s registered and has a profile assigned, the user goes through:
- Language and region
- Keyboard layout (and optional second layout)
- Network (Wi‑Fi or Ethernet)
- Windows updates (if applicable)
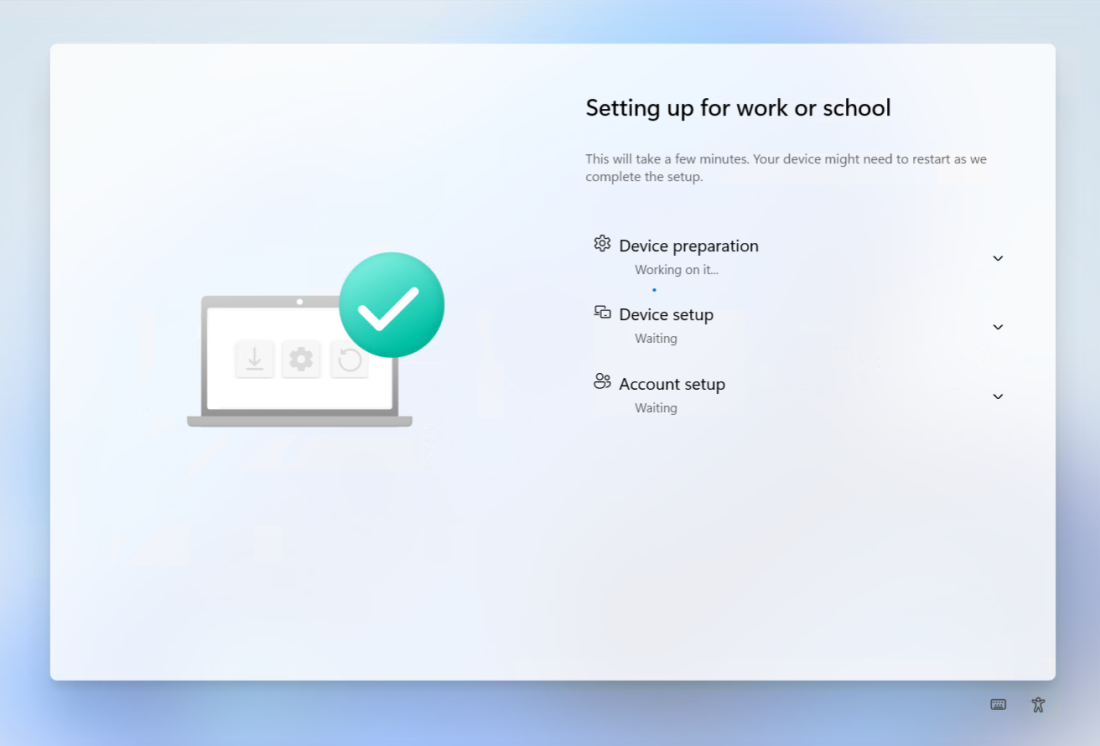
- Autopilot-driven experience: device may reboot if renamed, then the user signs in with their work account (Microsoft Entra ID). The device joins Entra ID, enrolls in Intune, and the ESP shows app and policy progress until the device is ready.
Once setup completes, the user has a managed device with your policies and required apps applied.
Conclusion
Windows Autopilot with Microsoft Intune gives you a repeatable, cloud-driven way to onboard and reset Windows devices. By collecting hardware hashes, registering devices, optionally configuring the Enrollment Status Page, and creating and assigning a deployment profile, you can move from “new device in box” to “user signs in and gets a configured PC” with minimal infrastructure and no custom imaging.