Keeping Windows, Microsoft 365 Apps, Edge, and Teams up to date across many devices is time-consuming and error-prone when done manually. Windows Autopatch is a Microsoft cloud service that automates this workflow: it uses deployment rings, health monitoring, and gradual rollouts so you spend less time on patching and more on higher-value work. This guide walks through how to implement Autopatch in your tenant using Autopatch groups and rings.
What Is Windows Autopatch?
Windows Autopatch is a cloud-based offering that standardizes and automates updates for Windows, Microsoft 365 Apps, Microsoft Edge, and Microsoft Teams. Instead of building and maintaining your own update schedules and rings, Autopatch provides a managed approach: a small test set receives updates first, then rings expand in stages so issues can be caught before the bulk of your fleet is updated. The service uses cloud intelligence to watch update health and can pause or adjust rollouts when problems are detected, helping you maintain security and reduce disruption.
Deployment Rings: Test, Dynamic, and Last
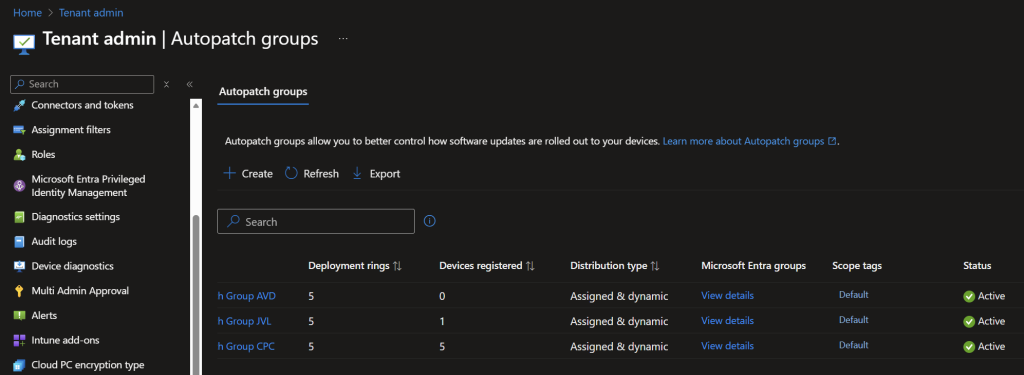
Autopatch organizes devices into rings. How many rings you use depends on your environment; a typical setup includes at least three dynamic rings plus two manual rings.
- Test ring . Manually populated with a small set of non-critical devices that receive updates earliest. Use these to validate changes before wider rollout.
- Ring 1, Ring 2, Ring 3 . Managed by Autopatch. Devices are distributed across these rings according to percentages you define (e.g. 1% / 9% / 90%). You can move individual devices between rings if needed.
- Last ring . Manually populated with high-priority or sensitive devices (e.g. key production machines, executives). These get updates last, within the deferral and deadline limits you configure.
Autopatch creates Entra ID groups for each ring. You only need to add devices to the Test and Last groups yourself; the service fills the dynamic rings based on your chosen distribution.
Create an Autopatch Group
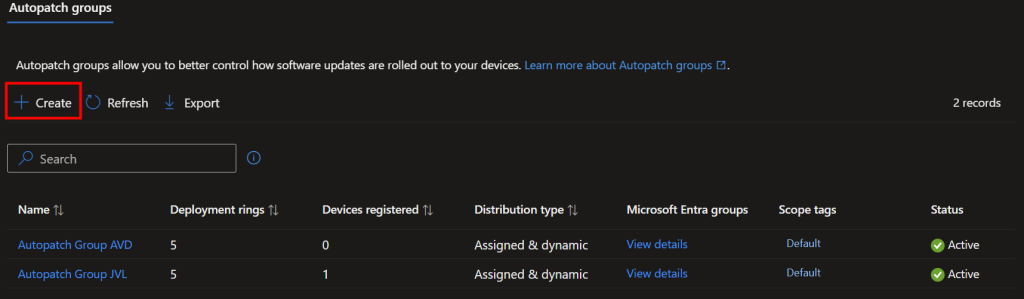
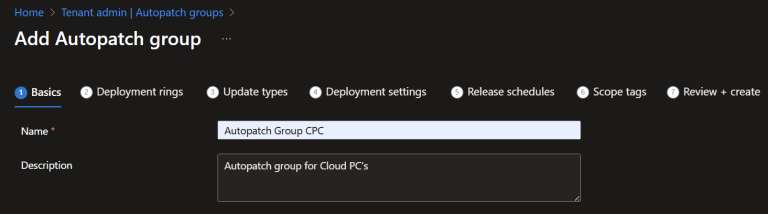
In the Microsoft Intune admin center, go to Tenant administration → Windows Autopatch → Autopatch groups. Click Create. Give the group a name (e.g. “Cloud PCs,” “Kiosks,” “Standard workstations”). This name is reused for the Entra ID groups Autopatch creates, so choose something clear and consistent. Creating one Autopatch group per device type or workload gives you finer control over update behavior for each group.
Add a Group and Define Deployment Rings
Under Deployment rings, click Add group. Select an Entra ID group that contains all devices that belong to this Autopatch group (e.g. a dynamic group that includes all Windows 365 Cloud PCs). This group is the source from which devices are randomly assigned to the dynamic rings. Devices in this group are registered with the Windows Autopatch service. The same group can include devices you later assign to Test or Last; Autopatch applies conflict rules to decide which ring wins.
You may see a message about dynamic distribution until rings are configured. Click Add deployment ring to add rings (e.g. three rings). Then use Apply default dynamic group distribution to split devices by percentage. For example 1% in Ring 1, 9% in Ring 2, 90% in Ring 3. You can change these (e.g. 5/10/85 or 10/20/70) as long as the total is 100%. The Entra ID groups for Test, Last, and each dynamic ring are created and managed by Autopatch; you do not assign them manually. Keeping the setup to Test, Last, and the dynamic rings. Without extra static groups per ring. Reduces complexity and avoids conflicting assignments.
How Autopatch Resolves Ring Conflicts
If a device is in both a dynamically assigned ring and a manually assigned ring (e.g. Test), the manually assigned ring (Test) wins. If a device is in two manually assigned rings, the ring that appears later in the ring order wins. Full details and examples are in the Microsoft Learn documentation.
Update Types and Deployment Settings
In Update types, choose which update categories Autopatch manages (Windows quality, feature updates, drivers, Microsoft 365 Apps, Edge, Teams). Many organizations leave all enabled and let Autopatch handle scheduling; you can exclude specific types if you manage them elsewhere.
Under Deployment settings you configure:
- Feature update . Which Windows feature update version is targeted for this Autopatch group.
- Driver updates . Manual approval, automatic approval, or a mix per ring (e.g. manual for your largest or most critical ring, automatic for others).
- Microsoft Edge . Same channel for all rings (e.g. Stable) or different channels per ring (e.g. Beta on Test, Stable on the rest). Beta on test devices can help catch issues early but may affect user experience.
Release Schedules and Notifications
For each ring you can set when updates install (e.g. weekly, or a specific week of the month), the day of the week, and the hour. Reboot and notification behavior is also configurable per ring. Separate schedules for business-critical devices can reduce surprise reboots. Notification options include default Windows Update notifications, turning off all except restart warnings, or turning off all notifications (often used for kiosks or signage).
Quality and driver updates use deferral and deadline settings; the effective compliance date is typically release date plus deferral plus deadline. Feature updates are often left at zero deferral with targeting done via feature update policies. Microsoft 365 Apps updates are offered by the CDN to random samples across rings; Autopatch policies control deferrals and deadlines after content is offered.
Scope Tags and Review
If your tenant uses scope tags, assign them to the Autopatch group as needed. On Review and create, confirm all settings and click Create. The new Autopatch group is then active; devices in the group you added are managed by Windows Autopatch according to the rings and settings you defined. Repeat these steps for other device populations (e.g. another Autopatch group for kiosks or developer machines).
Populate Test and Last Rings
After creation, add devices to the Test and Last rings. This is done manually by adding devices to the corresponding Entra ID groups Autopatch created. Using at least a Test ring is strongly recommended so you can validate updates before they reach the rest of the fleet.
Moving a Device Between Dynamic Rings
To move a device from one dynamic ring to another (e.g. from Ring 1 to Ring 3), go to Devices → Windows updates → Autopatch Groups Memberships. Select the device, click Assign ring, and choose the target ring. The device is moved from one ring’s Entra ID group to the other and will follow the new ring’s schedule and settings.
Summary
To implement Windows Autopatch: create an Autopatch group under Tenant administration → Autopatch groups, add an Entra ID group that contains the devices for this population, define deployment rings and dynamic distribution percentages, configure update types and deployment settings (feature update, drivers, Edge), set release schedules and notifications per ring, and optionally use scope tags. Review and create the group, then populate the Test and Last rings manually. Use Autopatch Groups Memberships to move devices between dynamic rings when needed. With this in place, Windows Autopatch keeps Windows, Microsoft 365 Apps, Edge, and Teams up to date while you retain control over which devices get updates first or last.