Many organizations standardize on Google Chrome and want specific extensions installed on every managed device. Microsoft Intune can force-install Chrome extensions via a Settings Catalog policy, so users get the right add-ons without manual setup. This guide walks through finding extension IDs in the Chrome Web Store and configuring Intune to deploy them.
At a Glance
You will:
- Look up each extension in the Chrome Web Store and copy its ID from the extension’s URL.
- Create an Intune configuration profile (Settings Catalog) for Windows 10 and later.
- Enable Configure the list of force-installed apps and extensions under Google Chrome → Google Chrome Extensions, then add the extension IDs.
- Assign the profile to the users or devices that should receive the extensions.
Extensions deployed this way are installed automatically and cannot be removed by users. For Edge or other browsers, use the corresponding Intune settings (not covered here).
Step 1: Get Extension IDs from the Chrome Web Store
Each Chrome extension has a unique ID that Intune uses to install it. You’ll copy these IDs from the extension’s detail page in the Chrome Web Store.
Open https://chromewebstore.google.com/ in your browser.

Search for the extension you want to deploy (e.g. Bitwarden, uBlock Origin). Open the extension’s page by clicking on it.
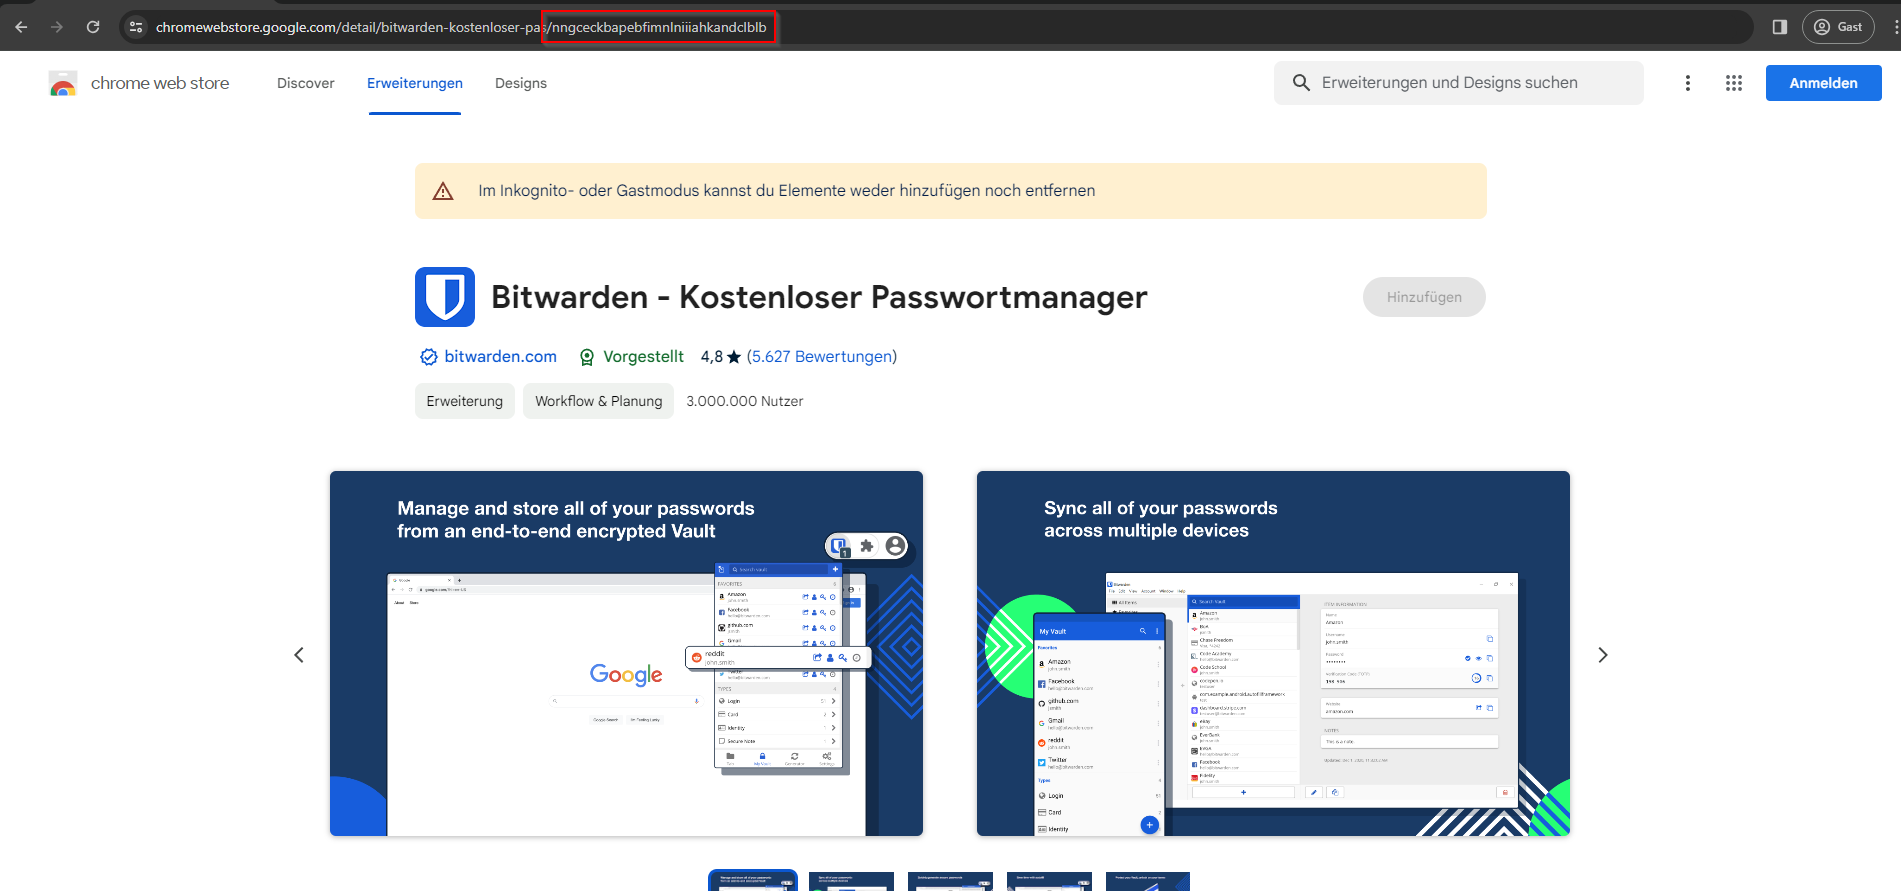
In the browser’s address bar, the URL will look like https://chromewebstore.google.com/detail/extension-name/XXXXXXXX.... The long string after the last slash is the extension ID. Copy that entire segment (e.g. nngceckbapebfimnlniiiahkandclblb for Bitwarden).

Repeat for every extension you want to force-install. Keep the IDs handy for the next step.
Step 2: Create an Intune Configuration Profile
In the Microsoft Intune admin center, go to Devices → Windows → Configuration profiles. Click Create → New policy.
Set Platform to Windows 10 and later and Profile type to Settings catalog. Click Create.

On the Basics tab, enter a Name (e.g. “Chrome force-installed extensions”) and optionally a Description. Click Next.
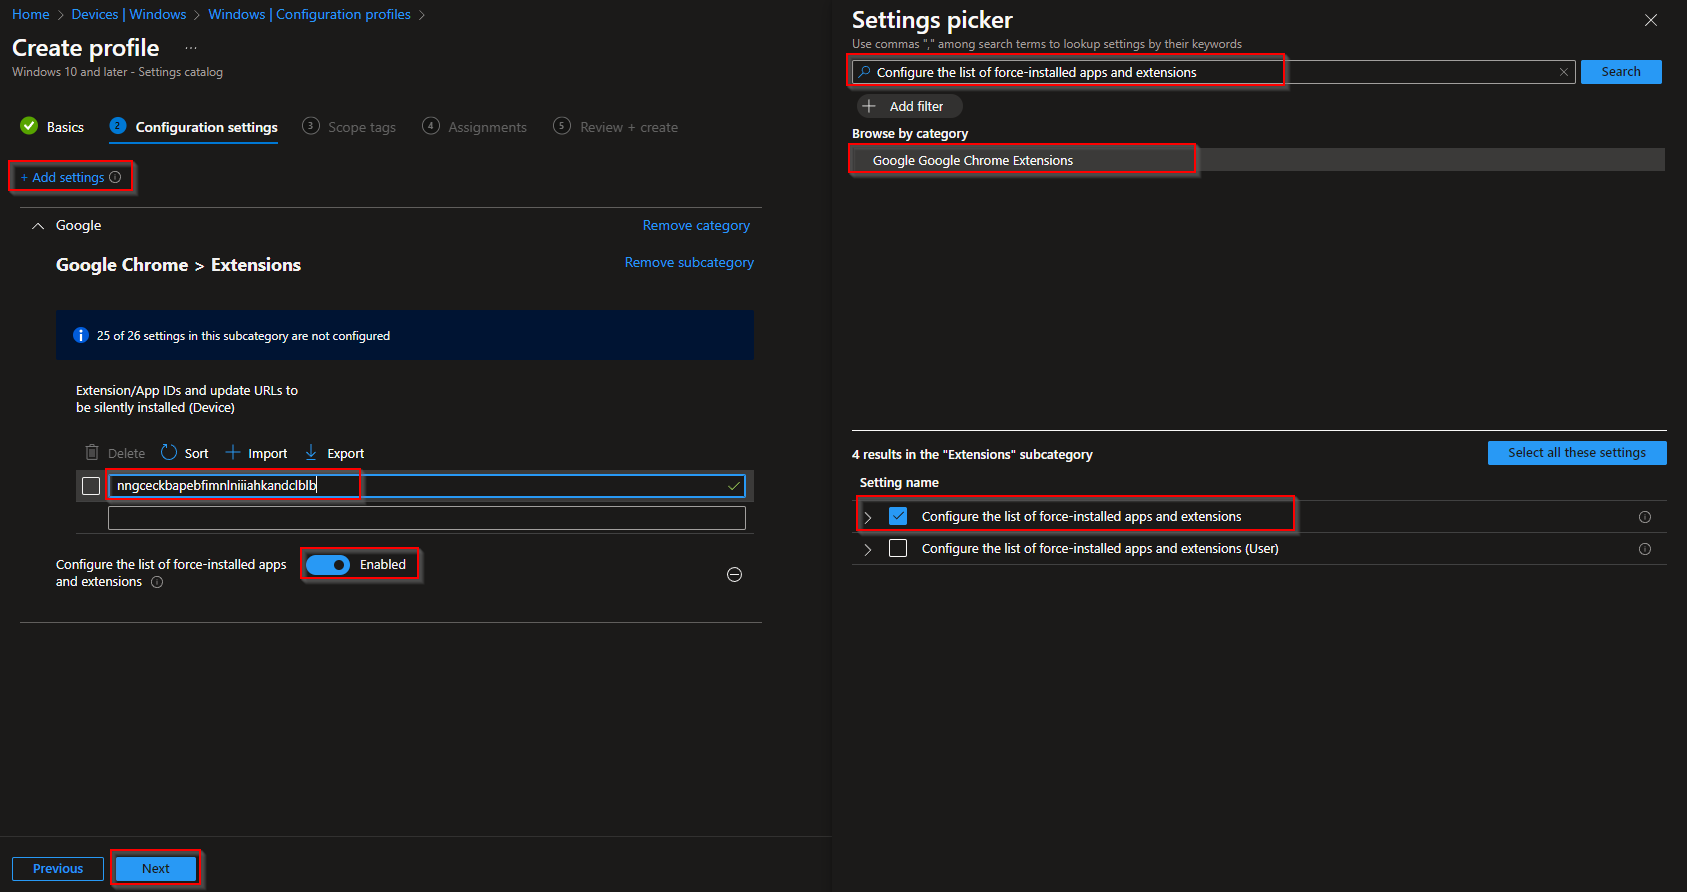
On the Configuration settings tab, click Add settings. Search for Configure the list of force-installed apps and extensions, expand Google → Google Chrome → Google Chrome Extensions, and add that setting. Enable it, then in the table add one row per extension and enter each extension ID (and optionally a URL; the ID is required). Click Next.
On Scope tags, add tags if your tenant uses them. Click Next.
On Assignments, add the groups (or All Users / All Devices) that should get these extensions. Click Next.
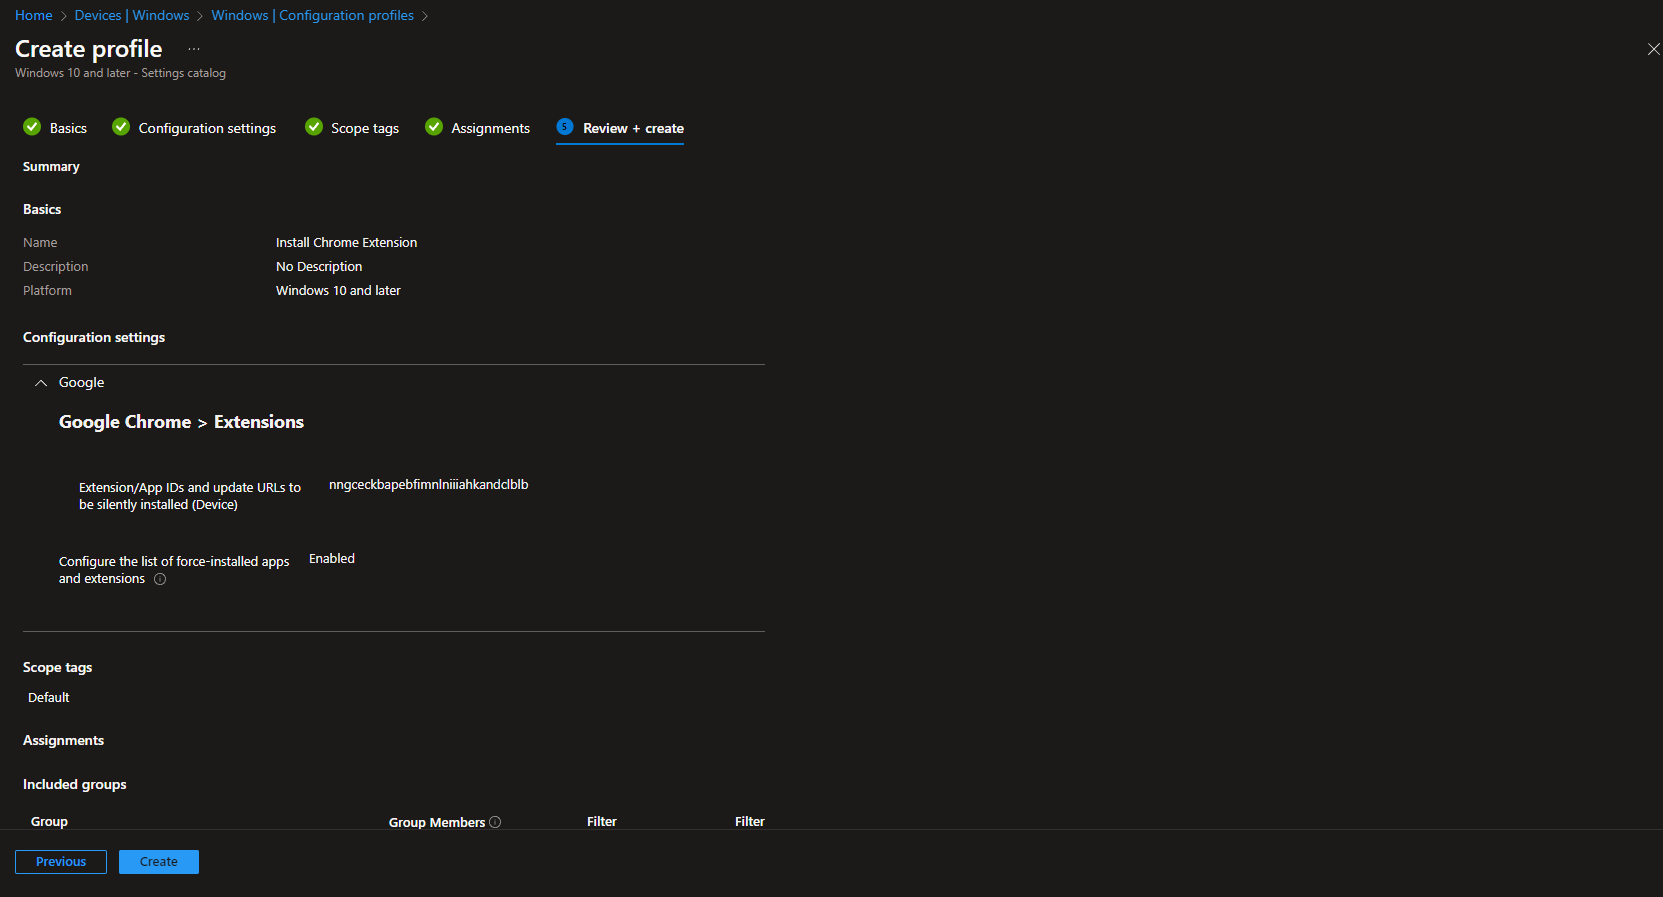
On Review + create, review the summary and click Create. After the profile syncs, Chrome on targeted devices will install the listed extensions automatically.
Wrap-up
You can deploy Google Chrome extensions with Intune by collecting extension IDs from the Chrome Web Store, creating a Settings Catalog profile, and configuring the force-installed apps and extensions list under Google Chrome Extensions. Assign the profile to the right users or devices to roll out a consistent set of extensions across your organization.