Full-disk encryption on macOS is handled by FileVault. When it’s on, the startup volume is encrypted so that data is protected if a device is lost or stolen. Microsoft Intune can enforce FileVault and manage recovery keys through a macOS Endpoint protection profile, so you get central control and visibility without touching each Mac manually. This post covers how to create that profile, what the user sees when FileVault is enabled, and where admins and users can get or rotate the recovery key. Plus how to use the encryption report in the admin center.
Add a macOS Endpoint Protection Profile
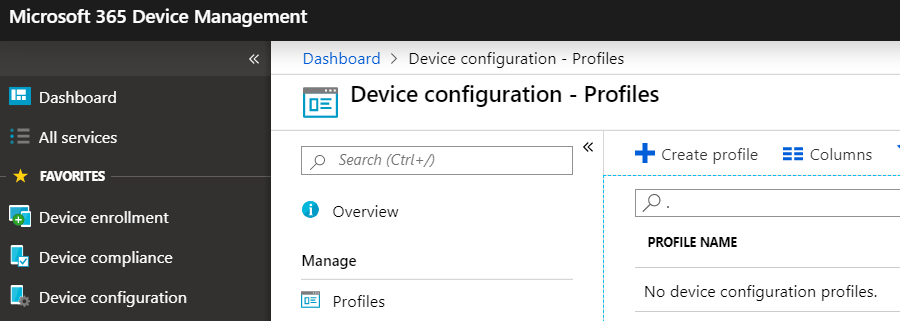
FileVault is configured under Device configuration in the Microsoft Intune admin center. Go to Devices → Configuration → Profiles and choose Create profile. Set Platform to macOS and Profile type to Endpoint protection, then click Create. On the Basics tab, enter a name (e.g. “macOS – FileVault”) and an optional description. Open the Settings tab and select the FileVault section to configure encryption and recovery.
Below: creating a new profile under Device configuration with Platform macOS and Profile type Endpoint protection.
The screenshot shows the FileVault section under the Settings tab, where encryption and recovery options are configured.
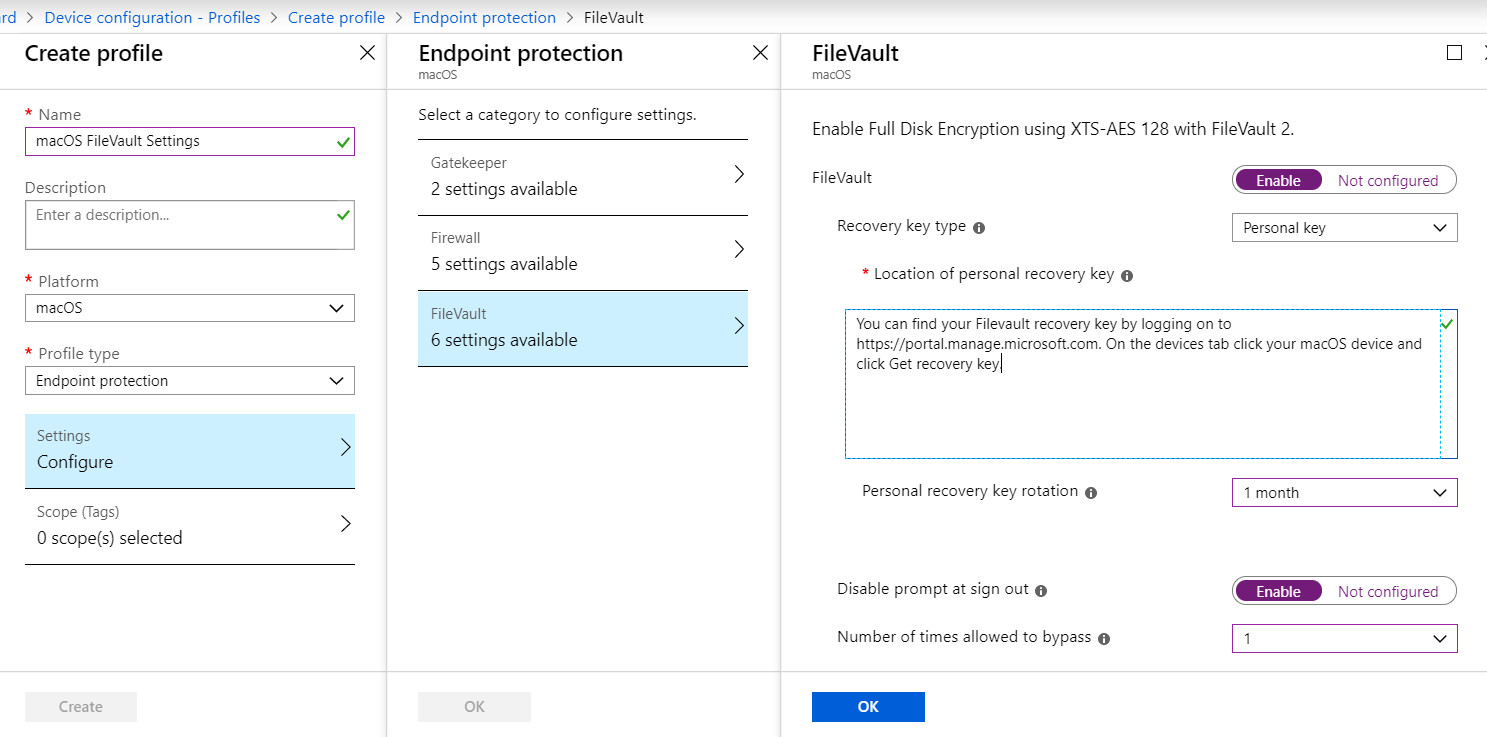
FileVault Options in the Profile
In the FileVault section, turn on Enable FileVault. For Recovery key type, Intune supports Personal recovery key only: the key is tied to the user and can be shown in the Company Portal and in the admin center (for corporate-owned devices). Under Location of personal recovery key, enter the text that will be shown to users so they know where to find their key (e.g. “Retrieve your recovery key from the Company Portal or contact IT”). Optionally configure Personal recovery key rotation if you want keys rotated on a schedule. You can set Disable prompt at sign out to Enabled so users are not forced to enable FileVault at sign-out; if you enable it, set Number of times to bypass so users can postpone the prompt a limited number of times. Click OK to save the FileVault settings, then complete the profile and Create.
Assign the Profile
After creating the profile, go to Assignments and assign it to the user or device groups that should have FileVault enforced (e.g. all macOS devices or a pilot group). Save. The profile will apply at the next sync. Unassigned devices will not receive the FileVault policy.
Below: the Assignments tab where the FileVault profile is assigned to a group.
What Happens on the Mac
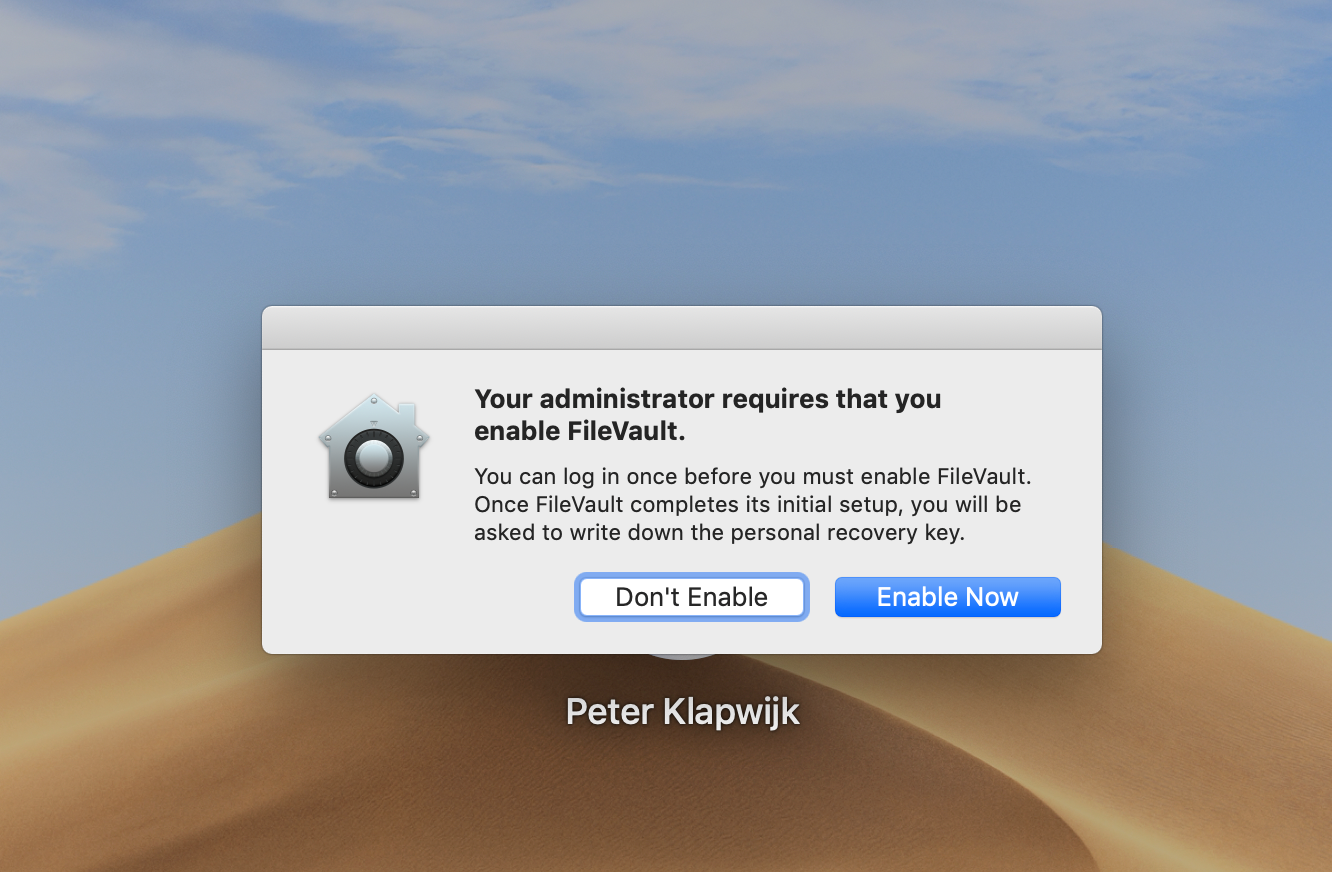
Once the Endpoint protection profile with FileVault is applied and the user signs in again, macOS may show a prompt to enable FileVault. The user clicks Enable now to start encryption. If you did not enable Disable prompt at sign out, the user will be prompted to turn on FileVault at their first sign-out until they enable it. After they choose to enable, encryption starts. They can wait for it to finish or dismiss the window and keep using the Mac; encryption continues in the background. Progress and status appear under System Settings (or System Preferences) → Security & Privacy → FileVault.
The following screenshot shows the prompt that asks the user to enable FileVault; the user clicks Enable now to begin encryption.
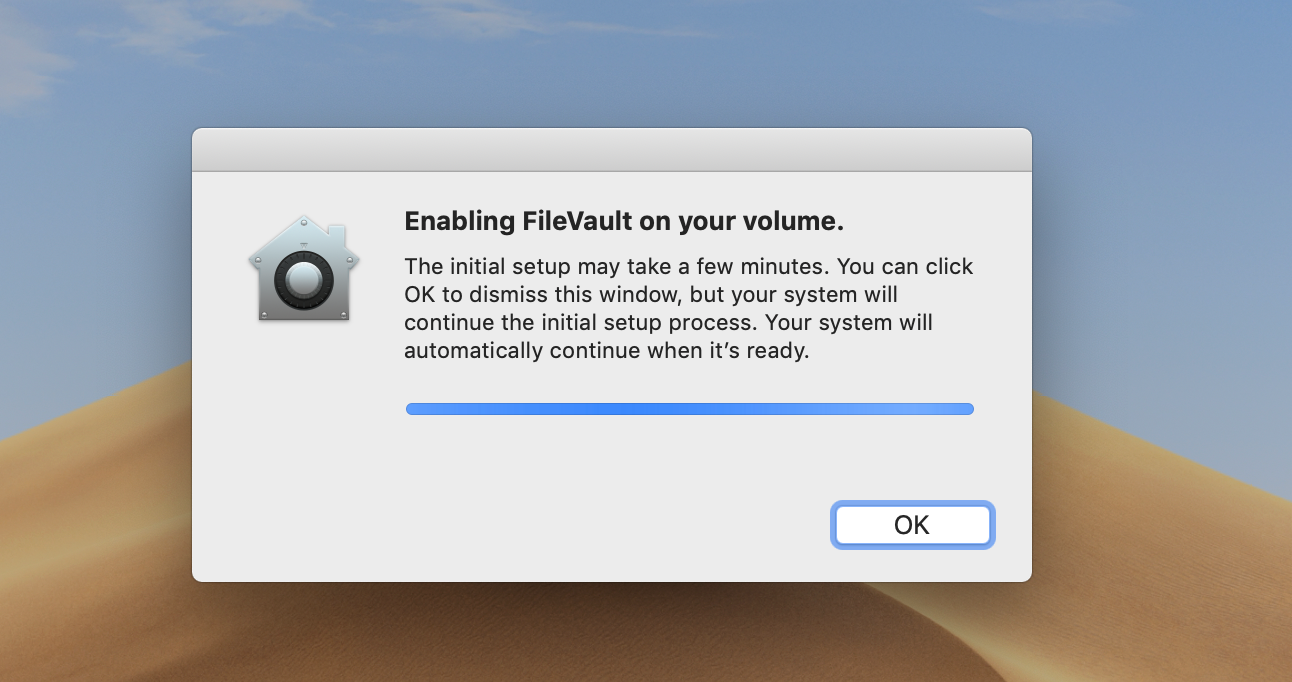
Below: the encryption progress window; the user can close it and continue working while encryption runs.
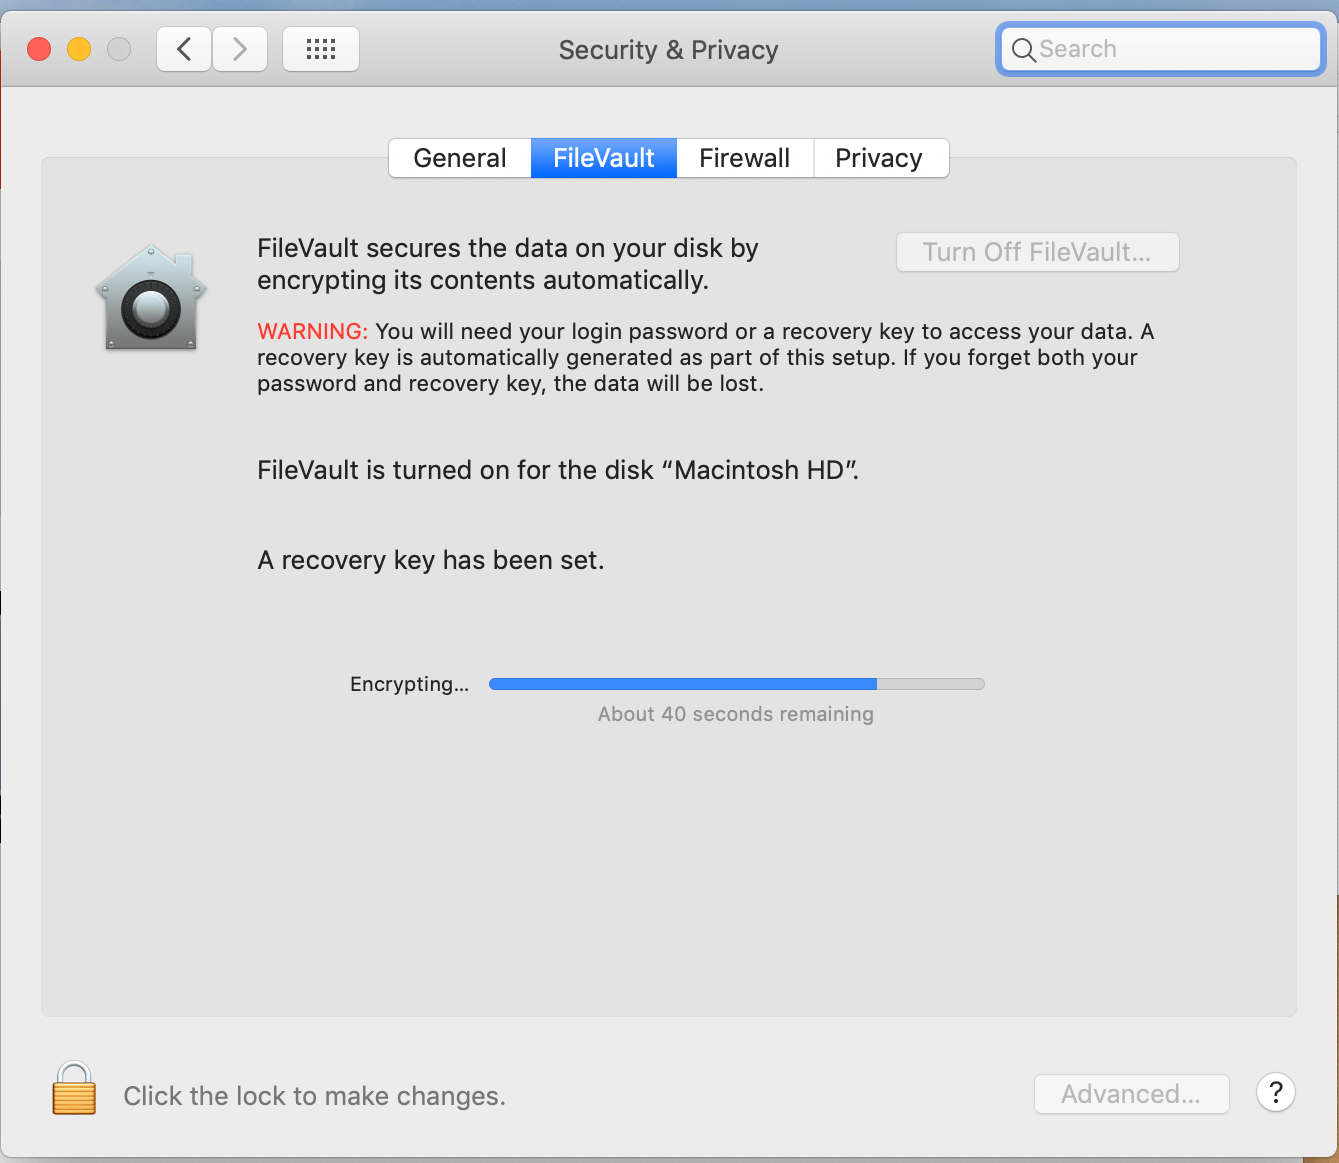
The screenshot shows FileVault status in System Settings (Security & Privacy → FileVault) right after enabling. Encryption is on and in progress.
Recovery Key: User and Admin
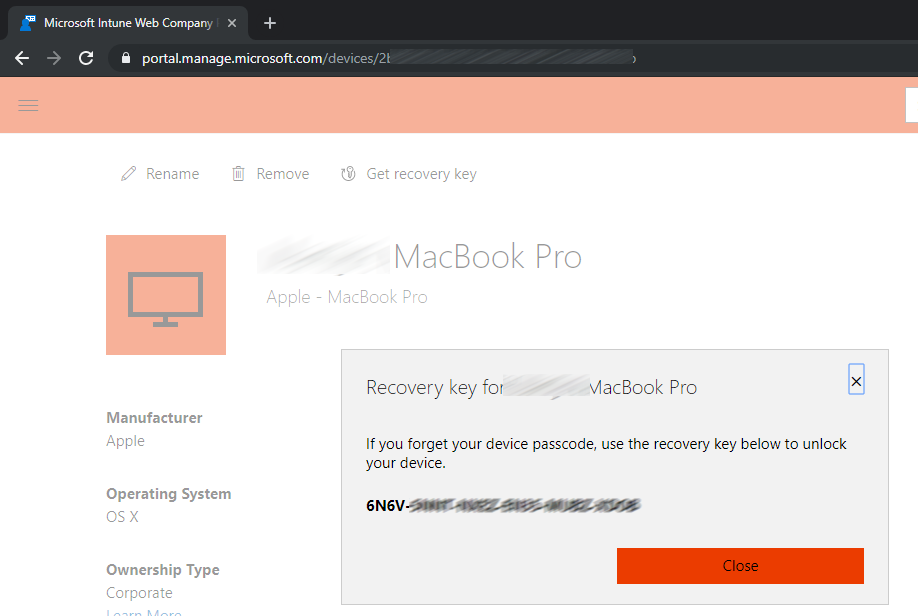
Users can retrieve their personal recovery key from the Intune Company Portal in a browser on any device. They open the Company Portal, go to the Devices tab, select their Mac, and choose Get recovery key. They should store the key somewhere safe; it’s needed to unlock the disk if they forget their password.
Below: the user retrieving the FileVault recovery key from the Company Portal (Devices → device → Get recovery key).
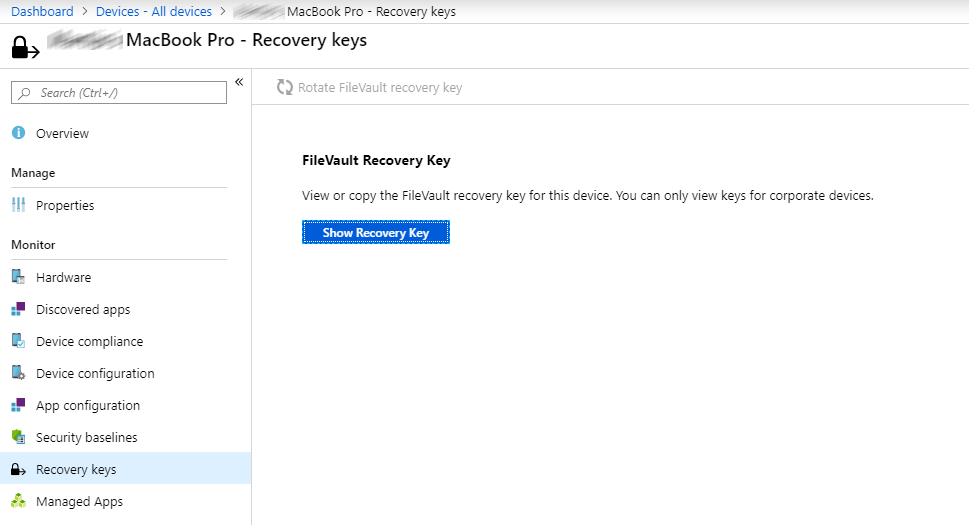
Admins can view and rotate recovery keys in the admin center. Go to Devices → All devices, select the macOS device, and open the Recovery keys tab. Click Show recovery key to see the key. This option is available only for corporate-owned macOS devices. If the device is personal, the button is not shown; you can change ownership to Corporate on the device’s Properties tab so the key becomes visible. Changing ownership may notify the user in the Company Portal app. After clicking Show recovery key, the FileVault recovery key is displayed. From the same tab you can click Rotate FileVault recovery key to generate a new key. The rotate action is also available from the device’s Overview tab under More.
The screenshot shows the Recovery keys tab in the Intune admin portal where you can show or rotate the key.
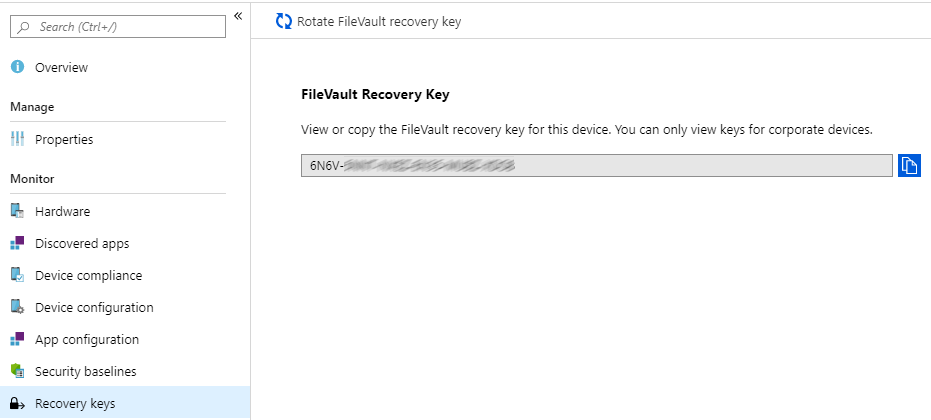
Below: the FileVault recovery key displayed after clicking Show recovery key.
Encryption Reporting
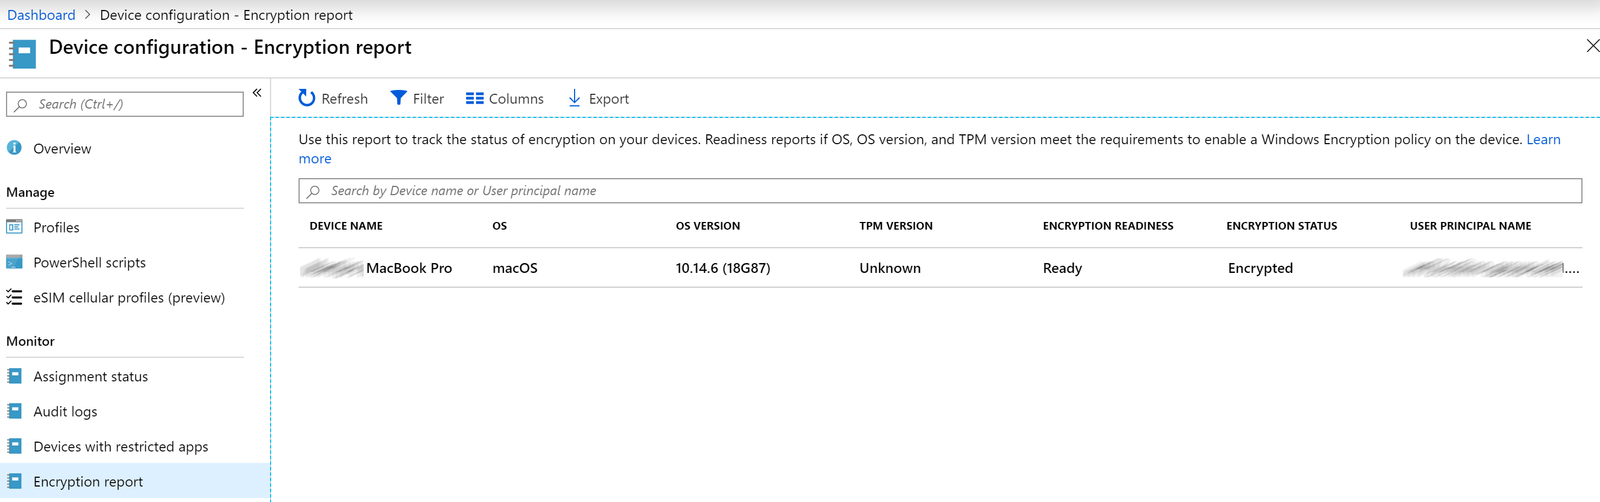
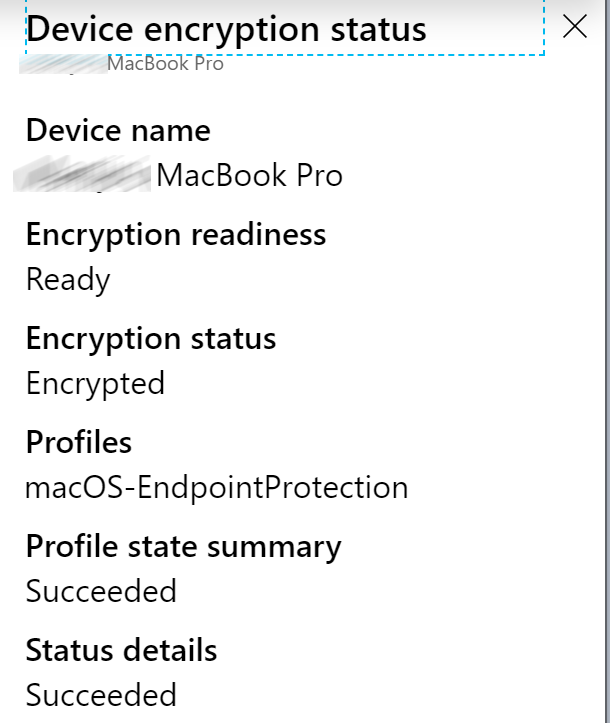
Intune’s Encryption report (under Devices → Monitor or Configuration, depending on the admin center layout) extends to macOS. You can see whether devices are ready for encryption and their current encryption status. Drilling into a macOS device shows which configuration profile contains the FileVault settings and whether that profile was applied successfully. Note that it can take up to 24 hours for encryption status or profile application to appear in the report after a change.
The following screenshot shows the encryption report with macOS device encryption status and readiness.
Summary
To configure macOS FileVault with Microsoft Intune: create a macOS Endpoint protection profile (Devices → Configuration → Profiles → Create profile → Platform macOS, Profile type Endpoint protection). In Settings, open the FileVault section, enable FileVault, set the recovery key type to Personal, and optionally configure key rotation and the sign-out prompt. Assign the profile to your macOS user or device groups. Users see a prompt to enable FileVault and can check status under System Settings → Security & Privacy → FileVault. They can retrieve their recovery key from the Company Portal; admins can view and rotate keys from the device’s Recovery keys tab (corporate-owned only). Use the Encryption report to monitor encryption status across macOS (and Windows) devices; allow up to 24 hours for status updates to appear.